

1/10-scale RC crawlers excel on outdoor trails because their substantial footprint, realistic ground clearance, and controlled low-end drivetrains smoothly tackle roots, rocks, loose dirt, and extended routes. Reliable trail performance depends on matching your vehicle setup to the terrain. A balanced approach combining suitable tire compounds, measured suspension adjustments, proper electronics protection within factory limits, and a thorough post-run inspection will maximize traction and chassis stability without adding unnecessary sprung weight or binding critical steering linkages.
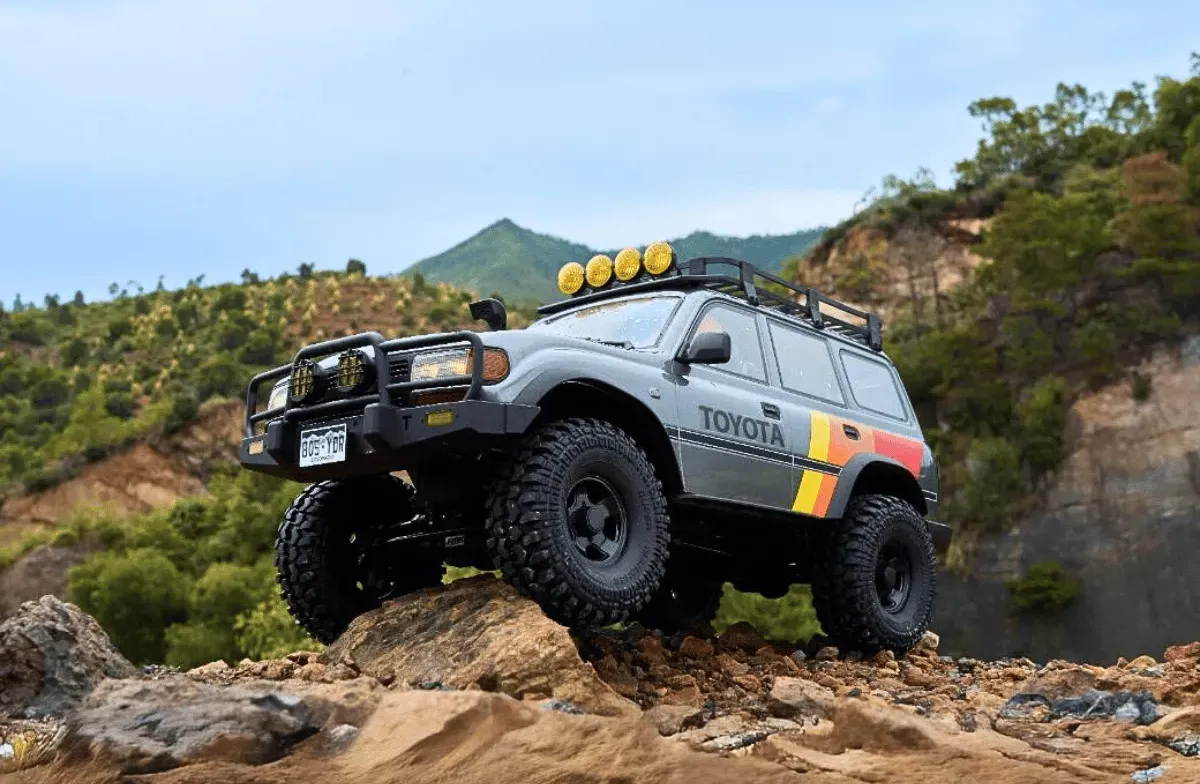
1/10-scale Crawlers Match Outdoor Trail Adventures
The larger footprint of a 1/10-scale crawler handles natural obstacles and rough hiking paths far better than micro platforms, allowing you to walk comfortably alongside your rig. While scale alone does not guarantee performance, this size gives chassis designers ample space for long-travel suspension, oversized trail tires, heavy-duty drivetrain components, and higher-capacity battery packs.
Larger Crawlers Handle Rougher Terrain
A 1/10-scale RC crawler easily spans trail fissures and roll-overs that would halt a smaller rig. Its tires bridge gaps, climb slick root steps, and maintain continuous contact over jagged rock faces. While a longer wheelbase provides predictable forward and backward weight transfer on steep climbs, drivers must carefully plan their line to preserve clearance at the breakover angle.
Added chassis weight helps tire treads conform to uneven rock, but excess weight creates significant drawbacks. A top-heavy body raises the rollover risk and places heavy stress on steering servos, link mounts, and axle gears. Heavy scale accessories mounted high drastically reduce stability on off-camber lines. The goal is always predictable chassis balance, keeping the battery pack and heavy electronics mounted as low as the chassis permits.
Vehicle width and tire outer diameter must always match trail conditions. A wide-track rig stays planted across open boulders but struggles through tight rock crevices or narrow canyon gates. Oversized tires increase axle clearance, but they alter overall final drive ratios, risk rubbing the body at full flex, and strain the drivetrain. Always consult factory compatibility sheets before changing wheel and tire dimensions.
Outdoor and Indoor Crawling Differ
Outdoor trail crawling introduces shifting surfaces, variable weather, extended distances, grit, and immovable obstacles. Unlike climate-controlled indoor courses where drivers can memorize and repeat identical lines on predictable foam or plaster, outdoor trails change constantly after rainstorms, autumn leaf drops, or foot traffic.
Trail crawling demands versatility over narrow specialization. Your crawler requires ultra-fine low-speed throttle modulation for technical rock crawling, adequate second-gear wheel speed for flat trail transfers, and composed manners over loose scree. Battery runtime and vehicle carry weight also become paramount considerations the further you venture from the trailhead.
Trail compliance and land access rules require careful verification during trip preparation. A trail that allows foot traffic does not automatically permit motorized hobby models. The U.S. Forest Service Motor Vehicle Use Maps provide clear classifications for trail boundaries, motorized restrictions, and seasonal access. If published trailheads do not explicitly list RC crawling, contact the regional land ranger for local guidelines.
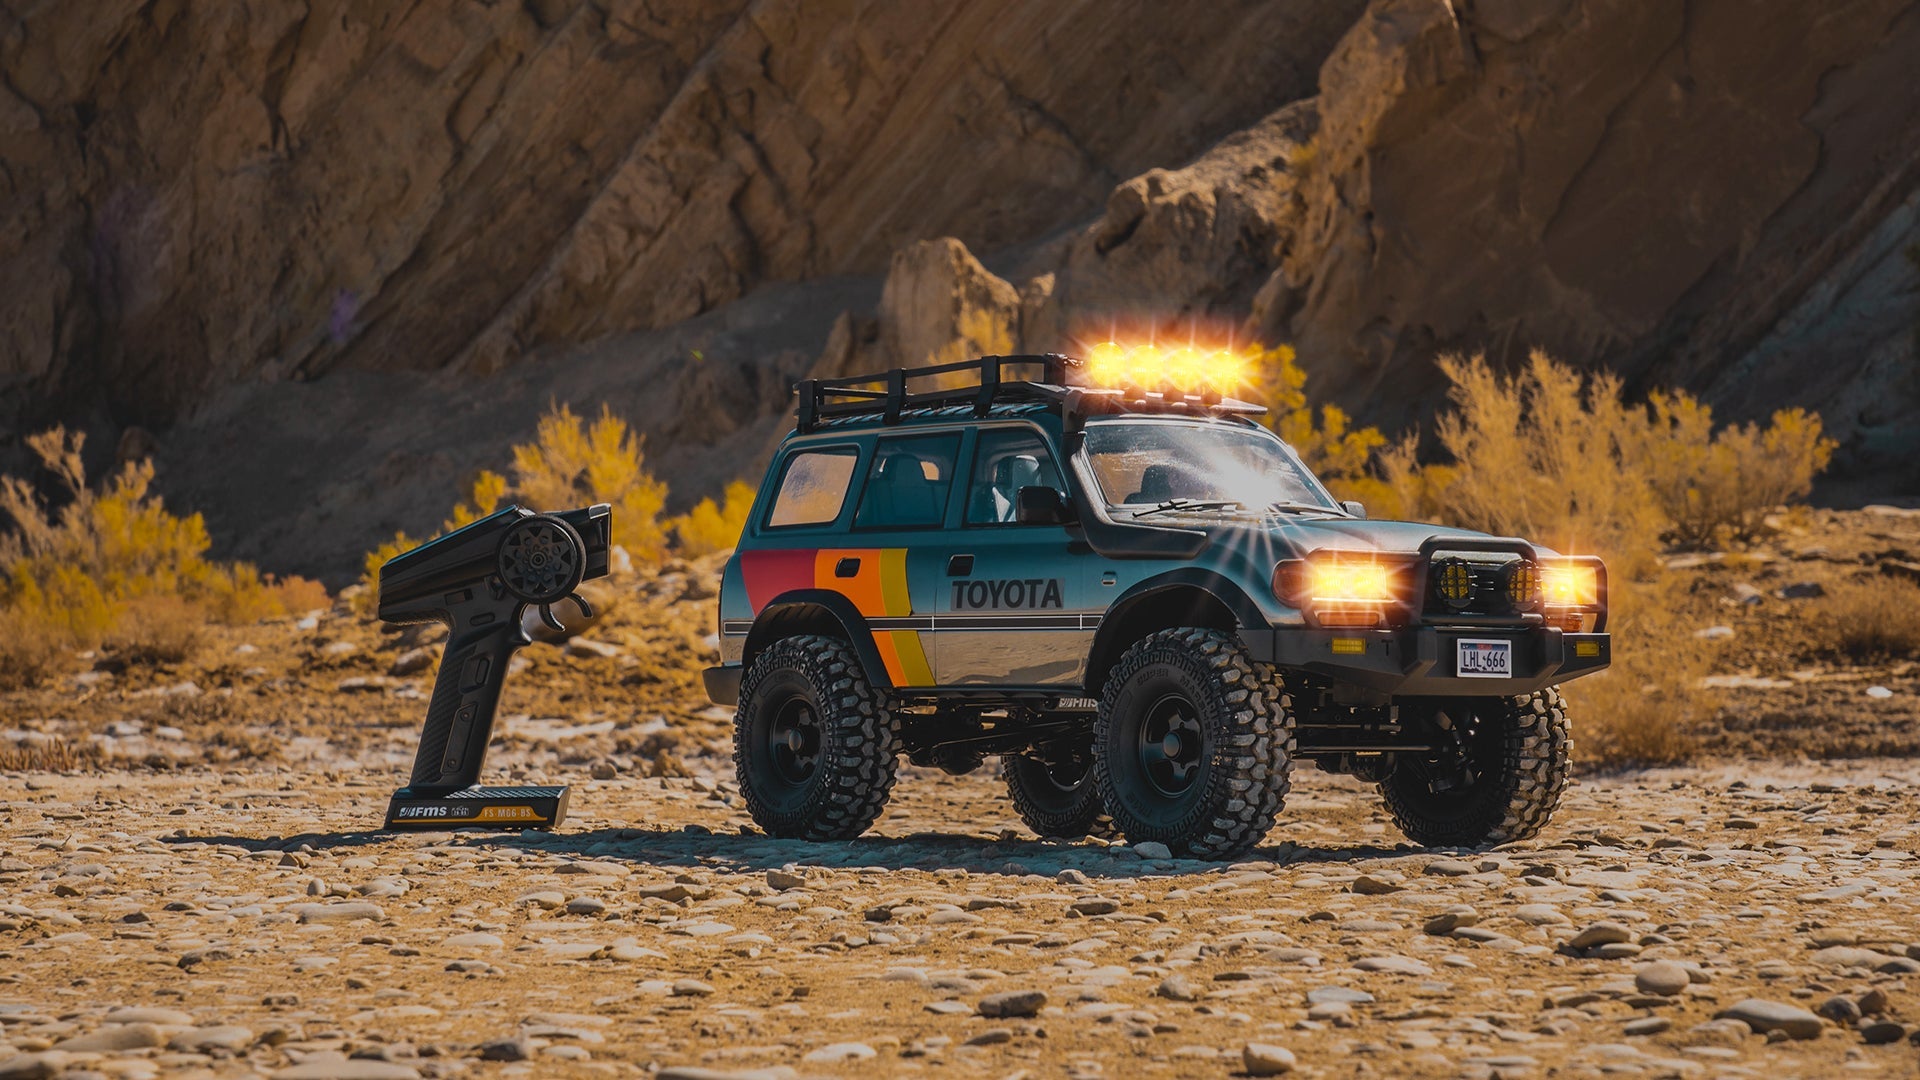
Tire Choice Controls Outdoor Trail Performance
Tires provide the crawler's only physical connection to the ground. Tread pattern, rubber compound, internal foam density, overall diameter, and wear condition dictate mechanical traction. Selecting tires based on real-world trail surfaces delivers far superior grip compared to simply choosing the most aggressive-looking tread design.
Tire Compound and Grip
A soft, sticky rubber compound conforms effortlessly around sharp rock edges, generating vital mechanical interlock. However, ultra-soft rubber wears quickly on abrasive sandstone, exhibits excessive sidewall squirm on steep sidehills, and feels vague on hardpack dirt. A firmer compound lasts longer and holds sidehill lines better, but struggles to generate grip on polished, wet rock surfaces.
Internal foam inserts deliver vital tire carcass support. An overly dense foam insert prevents the tread from wrapping around obstacles, severely shrinking the contact patch. Conversely, an insert that is too soft allows the sidewall to fold over during sidehilling, causing the rim to drag or unseat. Because total vehicle weight directly compresses the insert, setup specs for a lightweight competition buggy will not work on a full-scale, detailed hard-body overland rig.
Always use clean tires and properly torqued beadlock hardware when establishing a performance baseline. Accumulated trail dirt, mud glaze, and motor oils distort grip comparisons. When evaluating new compounds or dual-stage foams, change only one variable at a time on the exact same test obstacle with smooth, repeatable throttle input.
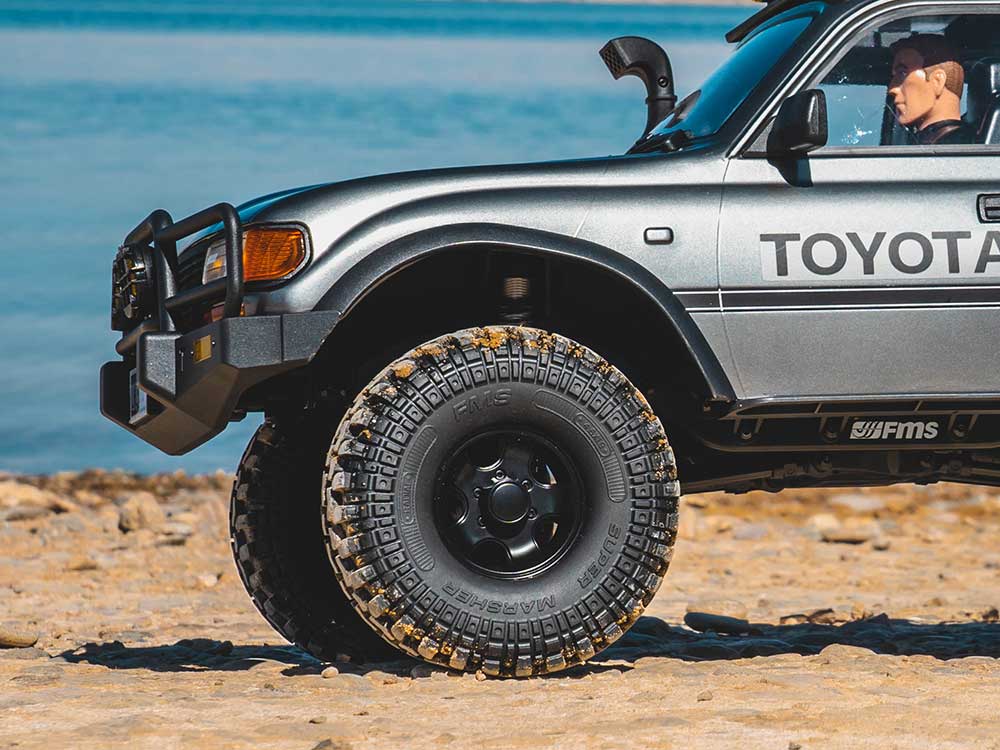
Tires for Dirt and Rocks
Loose dirt and deep forest loam require an open tread design with wide lug spacing that sheds mud rather than packing full. Dense, siped tread patterns run smoothly across hardpack surfaces but quickly pack into slick slicks in wet soil. On dry, bare rock, pliable tread blocks with high surface-contact area optimize friction, whereas tall, unsupported pins wander unpredictably under lateral load.
Mixed terrain trails always require a strategic balance. Select tires optimized for the trail's steepest, most challenging technical segment, as long as they provide predictable handling across the rest of the loop.
| Trail Condition | Setup Priority | What to Check During Testing |
|---|---|---|
| Packed Dirt | Directional stability and steering response | Front-end push in sharp corners or sliding under drag brake |
| Loose Soil | Open-lug mud cleanout and throttle control | Tire pack-up and excessive wheel dig |
| Dry Slick Rock | Conforming tread and progressive throttle | Surface contact patch and axle bounce over sharp ledges |
| Side Slopes | Firm sidewall support and low center of gravity | Tire sidewall folding and lateral chassis rollover |
| Mixed Trail | Balanced compound wear and predictable bite | Seamless transitions between slick and grippy ground |
An optimized tire choice works hand-in-hand with driver finesse. Smooth throttle application gives the rubber lugs time to bite, while sudden full-throttle bursts polish the surface, destroy traction, or kick the axle off line. Always verify that tires clear the fenders, link screws, and steering tie rods at full suspension compression and full steering lock.
Suspension Setup Improves Rough Terrain Control
A dialed suspension setup keeps all four tires planted against uneven terrain while controlling excessive chassis lean. Contrary to popular belief, maximum articulation is not the ultimate goal; excessive flex can cause unpredictable torque twist, destabilize the rig on sidehills, and lead to abrupt rollovers.
Shock Settings for Trail Driving
The stock suspension geometry configured by the manufacturer provides an ideal tuning baseline. Always document resting ride height, shock collar preload positions, and mounting holes before making adjustments. Thoroughly inspect shock shafts for bends and cartridges for oil leaks to distinguish genuine tuning traits from damaged hardware.
Spring preload collars adjust the chassis ride height and proportion between bump travel and droop travel. Adjusting preload does not alter the spring rate itself. Adding excessive preload raises the vehicle's center of gravity and eliminates essential droop travel, while backing collars off too far causes the skid plate to bottom out on minor obstacles. Make small, symmetrical adjustments across both sides of the axle.
Shock damping controls how quickly the springs compress and rebound. If your rig pogo-sticks over rock drops, heavier silicone shock oil or pistons with smaller holes will control the bounce. However, over-damped suspension moves too sluggishly to absorb high-speed trail chatter. Shock oil viscosity, ambient temperature, internal bladder tension, and O-ring friction all interact, making generic shock oil recommendations unreliable without vehicle-specific testing.
The FMS 1:10 FCX10 OVR LC80 RS Brushless exemplifies a well-engineered trail chassis. The official platform specifications highlight heavy-duty front and rear solid portal axles, threaded aluminum oil-filled shocks with adjustable ride height and damping, a shiftable two-speed transmission, an all-metal geartrain, and officially licensed HDR wheels mounted with TOYO Open Country A/T III scale tires. These features provide a rugged foundation for precision tuning, allowing drivers to dial in custom trail setups for any route.
Stability on Slopes
Sidehill stability is governed by center of gravity, track width, tire sidewall stiffness, suspension travel, and driving angle. Fastening the battery securely into its low-slung tray prevents sudden weight shifts, while avoiding heavy scale roof racks preserves off-camber balance. Even lightweight plastic accessories mounted on the roof act as a high leverage point against chassis stability.
Approach off-camber sections at a smooth, deliberate pace. This allows you to monitor tire deflection and keeps the steering responsive for a downhill recovery turn if the vehicle begins to tip. Never snap the steering sharply uphill on a steep sidehill, as doing so immediately transfers weight onto the lower downhill tires and triggers a rollover.
Lowering the chassis ride height slightly increases sidehill stability, provided the skid plate still clears trail rocks. Internal shock travel limiters or external limit straps help prevent front axle unloading on steep vertical climbs. Test one reversible suspension adjustment at a time so you can quickly return to your baseline if trail performance degrades.
Protect Your Crawler During Outdoor Runs
Reliable outdoor operation requires strictly adhering to your model's water-resistance ratings, driving responsible lines, and cleaning away trail debris before it accelerates component wear. A chassis marketed as water-resistant or splash-proof must never be treated as fully submersible.
Water Protection and Cleaning
Review the exact factory documentation for your receiver, electronic speed controller (ESC), steering servo, motor, battery, and charger to determine specific ingress ratings. Protection levels vary significantly across components within the same chassis. Sealed receiver boxes, rubber boot seals, and conformal coating provide protection, but aging O-rings, pinched wires, or cracked cases can allow moisture inside.
Never submerge an RC crawler unless all electronics are rated for full submersion. Immediately after operating in wet conditions, disconnect and remove the battery pack to eliminate electrical short hazards while the vehicle air-dries. Clean and lubricate exposed axle bearings, metal universal driveshafts, and link hardware to prevent rust. Avoid high-pressure sprayers, which blow grit past rubber bearing seals directly into internal gears.
Dry cleaning is the safest method for removing trail dust and dry soil. A soft-bristled brush combined with gentle, low-pressure compressed air removes trail grit without forcing dirt into sealed bearings. When cleaning thick mud, follow the manufacturer's recommended methods, avoiding aggressive automotive brake cleaners or harsh solvents that degrade plastics, scale body paint, silicone wires, and tire rubber compounds.
Inspect LiPo battery packs closely after any heavy tumble, chassis puncture, or damp trail run. If a battery pack displays swelling, physical denting, an unusually hot surface, or damaged lead wires, retire it from service immediately. Follow the EPA's official used lithium-ion battery guidance, which specifies that damaged or swollen lithium batteries must never be discarded in regular household trash or municipal recycling bins, but handled via specialized hazardous waste recyclers.
Post-Drive Parts Checks
A concise, systematic post-trail inspection identifies mechanical wear before it causes costly breakdowns. With power safely disconnected, rotate the drivetrain wheels by hand to feel for binding bearings, stripped ring-and-pinion gears, or twigs wrapped around the stub axles. Verify that all 12mm wheel hex nuts, driveshaft grub screws, suspension link rod ends, and shock mounting hardware remain securely fastened.
Look for bent aluminum tie rods, leaking shock O-rings, cracked tire sidewalls, backed-out beadlock screws, and pinched wiring harnesses. Compare left and right suspension articulation by hand; if one wheel binds or fails to compress smoothly, check for bent shock shafts, packed rock debris, or deformed suspension links.
Responsible trail drivers protect the natural environment just as carefully as their scale crawlers. Stick to durable, designated trails and avoid tearing up delicate moss or fragile alpine soil with excessive wheelspin. Never displace rocks or rip live roots simply to manufacture a crawler line. The non-profit Leave No Trace organization emphasizes sticking to durable surfaces, minimizing trail impact, and never cutting across switchbacks. Always pack out sheared pins, zip ties, torn tires, and trail trash.
Build Better Outdoor RC Adventures
Building a dependable outdoor trail crawler centers on control, durability, and tailoring your setup to the local terrain. A clean, mechanically sound baseline allows you to fine-tune tire compounds, foams, and shock damping with precision. Factory water-resistance ratings, local park regulations, and post-run maintenance routines should guide every upgrade. Explore the comprehensive 1/10-scale RC collection and the versatile lineup of RC rock crawlers to find the ideal match for your trail terrain, scale overland dreams, and driving style.
Frequently Asked Questions
Q1. Should I Carry a Spare Battery on a Trail?
Yes, carrying a spare battery pack is highly recommended on longer excursions, provided it meets the manufacturer's voltage specifications. Always transport spare packs inside a fire-resistant LiPo bag, shielded from blunt impacts, moisture, intense direct sunlight, and loose conductive metal tools in your backpack.
Q2. Can I Use a 1/10-scale Crawler on Hiking Trails?
Permission depends entirely on the land manager's specific rules and how unmanned RC models are categorized. Always confirm local municipal or forestry regulations before packing your rig, and always yield the right of way to hikers, trail runners, and pack animals.
Q3. Do Beadlock Wheels Help Trail Maintenance?
Yes, multi-piece beadlock wheels eliminate the need for CA glue, allowing quick trailside tire swaps, foam insert adjustments, or wheel weight modifications. However, they require careful assembly in a star pattern and regular bolt tightness inspections.
Q4. How Should I Transport a Muddy RC Crawler?
Transporting a dirty rig is best done using a ventilated, heavy-duty plastic tote or rubber gear tray after disconnecting and removing the battery pack. Storing muddy crawlers separately protects your vehicle trunk, spare LiPo batteries, and transmitter from moisture and abrasive grit.
Q5. Is a Winch Necessary for Outdoor Crawling?
No, a winch is not mandatory unless you specifically enjoy technical scale recovery scenarios or participate in scale crawler competitions. A functional winch adds weight over the front bumper and requires careful wiring, so master basic driving lines before installing extra accessories.