
RC airplane visibility tips start with one simple rule: if you cannot clearly read the airplane in the air, your safety margin is already shrinking. The goal is not a magic distance number. It is keeping enough visual clarity to follow attitude, nose direction, and bank angle before you start guessing.

Why RC Airplanes Become Hard to See in the Air
RC airplanes get harder to read for three reasons that usually stack up at once: they shrink with distance, they blend into the background, and they move faster than your eyes can re-check every detail. For recreational flying, the FAA states you need a visual line of sight so you can see and avoid hazards, and the AMA's see-and-avoid capability guidance points in the same direction.
Distance Reduces Orientation Detail
A remote-control plane that looks obvious on the ground can become a thin silhouette or even a dot once it gets farther out. At that point, wing angle, nose direction, and whether the airplane is banking left or right all start to blur together.
That is why distance and size work together. A small plane can become hard to read sooner, but even a larger model can fade once it is far enough away that the pilot has to interpret shape instead of seeing it directly. The practical issue is not just "how far," but "how much detail is left."
Lighting Can Hide Direction Cues
Lighting changes the same airplane from clear to vague very quickly. Backlighting can wash out the nose, haze can flatten the outline, and glare can make the underside disappear against a bright sky. In those moments, the plane may still be visible, but it is no longer easy to orient.
That is the failure point most pilots care about. If the model is visible but the direction cues are not, you may still be looking at it without actually reading it well enough to correct smoothly.
Speed Leaves Less Time to Correct
A faster pass gives you less time to confirm what the airplane is doing. A tiny bank or heading error that would be easy to catch at a slower pace can turn into a bigger correction because you notice it later.
For beginners, that delay is often the real problem. The airplane is already small, and speed removes the time you would otherwise use to re-check the attitude before making the next stick input. If you are forcing yourself to guess, slow the airplane down or bring it back in.
Choose Body Colors That Show Direction Clearly
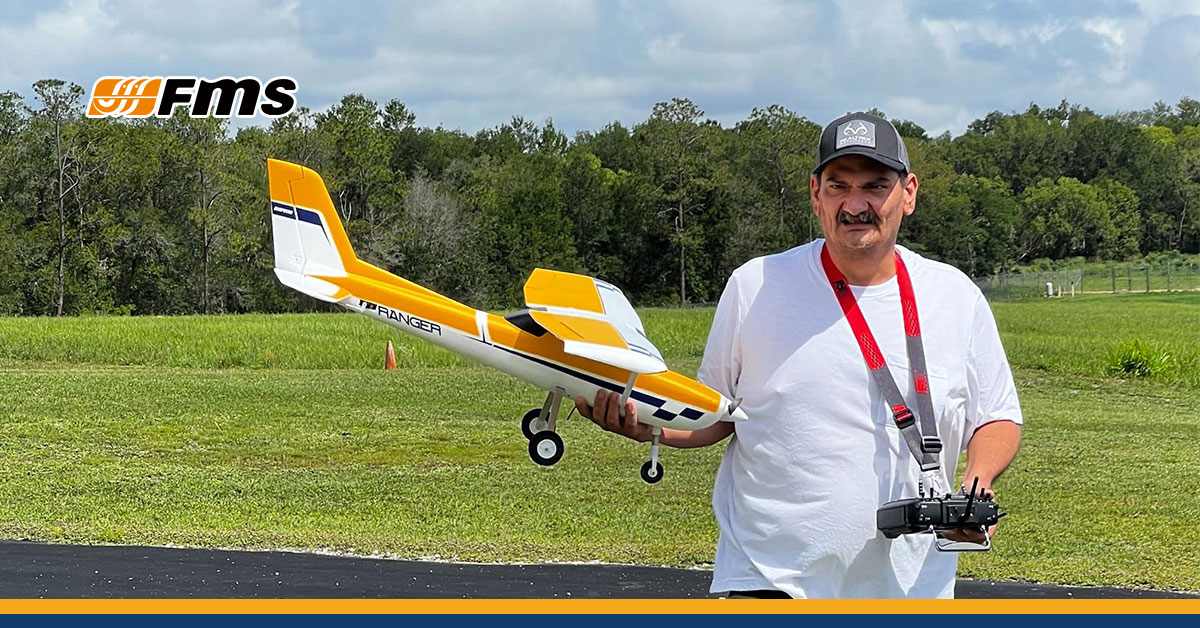
Color helps only when it creates fast contrast. The best RC airplane visibility tips are not about one perfect paint color. They are about making the top, bottom, nose, and wingtips easier to separate at a glance.

Use Top-Bottom Contrast First
A strong top-versus-bottom contrast makes the bank angle easier to read. In plain terms, you want to know whether you are looking at the top of the airplane or the underside without needing extra time to decode it.
Simple two-tone schemes often work better than subtle color shifts because the eye can catch the difference faster. The concept of high-contrast orientation cues from model-building advice is useful here: quick recognition matters more than decorative detail.
Add Nose and Wingtip Markers
A distinct nose or bright wingtip markings can help you confirm which way the airplane is pointing during a turn. That matters because the hardest moment is often not straight flight, but the moment the plane is banked and the fuselage no longer looks familiar.
A small but obvious contrast zone can be more useful than painting the whole model one bright color. The point is to create a fast landmark for your eyes, especially when the aircraft is already small against the sky.
Match Colors to Your Flying Background
Pale blue, washed-out gray, and low-contrast schemes can disappear faster than pilots expect. A color that looks bold in the workshop may vanish against a bright sky, haze, or a thin cloud layer.
Match the scheme to the background you actually fly over most often. If your field is bordered by trees, darker accents may help. If the airplane usually crosses a bright open sky, contrast between surfaces matters more than matching a favorite paint color.
Check the Weather and Background Before Flying
A plane can be easy to read in one field and hard to read in another, even at the same distance. That is why weather and background deserve a proper preflight check, not just a quick glance after takeoff.
| Condition | Visibility Risk | Safer Flying Adjustment |
|---|---|---|
| Bright open sky | Light colors can wash out. | Use stronger surface contrast and avoid flying into glare. |
| Haze | The outline becomes flatter. | Keep the plane closer and reduce speed. |
| Cloud edges | The airplane may briefly disappear. | Avoid long passes across sharp brightness changes. |
| Tree line | The model can blend into a dark background. | Keep turns away from the edge until orientation is clear. |
| Low-angle sun | Nose and bank angle become harder to read. | Shorten the session or fly a simpler pattern. |
| Dimming light | Visibility can drop quickly. | Stop before the plane becomes vague. |
That is a good time to scale back the session rather than push for one more pass. A conservative rule is simple: if the airplane stops reading cleanly in the light you have, treat that as a cue to shorten the flight.
Plan a Simple Flight Path Before Takeoff
A simple flight path makes the airplane easier to follow because it reduces surprises. You are not trying to fly like a pattern competitor; you are trying to keep the aircraft where your eyes can keep up with it.
Keep the airplane in front of your body position instead of letting it drift behind you or far off to the side. Once it disappears from your strongest viewing zone, you spend more attention searching and less attention flying.
This is especially helpful on early flights. If the plane stays in front of you, you can watch attitude changes with less head-turning and fewer late stick corrections.
Pick visible turn points before takeoff, such as a tree gap, a runway edge, or another fixed landmark that is easy to see from the pilot spot. Those points give you a reference for where to start a turn before the plane gets hard to read.
The point is not perfect geometry; it is predictability. A plane that keeps crossing the same visible lane is much easier to manage than one that drifts into random parts of the field.
Wide passes give you more time to confirm orientation and more room to recover if the airplane starts drifting. That is usually safer than tight turns or aggressive figure-eights when you are still building visual confidence.
If you want to improve the basics of control and awareness, our RC airplane flying skills guide covers simulator practice, sensitivity tuning, and reaction drills that support safer first flights. Use those skills to make your flights calmer, not to stretch visibility farther.
Set a Distance Boundary for Your Skill Level
There is no universal safe distance for every RC airplane, pilot, or field. The right boundary is the point where the airplane is still readable without strain. That is why the FAA's VLOS rule and the AMA's line-of-sight guidance matter in practice: you are expected to keep enough visual contact to track the model, not just know it is somewhere out there.
| Flying Situation | What You Should Notice | Action To Take |
|---|---|---|
| Early flights | You can read the nose, bank, and turn direction without effort. | Stay conservative and keep the model closer than your comfort ceiling. |
| Normal practice | The airplane is still clear, but you need a little more focus in turns or against a bright sky. | Keep flying only if you can still track it smoothly and recover easily. |
| Stop-now condition | You are guessing at orientation, or the plane keeps blending into the background. | Bring it closer, slow down, or land right away. |
That table is the decision rule in plain language. If readability drops, the correct response is to shorten the flight envelope, not to keep testing how far you can push it.
What to Do When You Lose Orientation
The conservative recovery sequence is simple: reduce panic inputs, level the wings first, and return to a known visible path (or land if the picture does not come back quickly). The AMA's first-time flier safety guidance follows that same calm, low-risk approach.
When the airplane looks confusing, the first mistake is usually over-controlling. Pilots tend to move the sticks harder, which can make the situation worse.
Instead, reduce the size of your inputs and give yourself a beat to re-read the airplane. You are not trying to rescue the model in one dramatic correction. You are trying to get back to a stable picture.
A wings-level attitude often makes the next correction easier to understand. Once the airplane is closer to level, the rest of its motion is easier to read, and the chance of a confusing spiral or steep bank drops.
Keep this step high-level. The goal is not aerobatics. It is a visual reset that gives you a clean reference before you do anything more aggressive.
If you still cannot read the airplane, bring it back to a path you already know, such as a straight leg toward your field reference or a conservative circuit around the safe area. If that does not restore orientation fast enough, end the flight.
Visual Features That Help Beginner Pilots
Beginners usually benefit from cues that make the airplane easier to separate from the background, not from features that make the model more complicated to manage. In practice, that means choosing visible shape cues as much as flight behavior.
A larger airplane can be easier to spot because it leaves more visible shape at a distance. That does not make it automatically safer, but it can make orientation easier for a new pilot who is still learning how the plane reads in the sky.
If you are comparing beginner options, check whether the model keeps enough visual presence for your usual field size. Our RC plane size comparison can help you judge scale before you buy.
High-contrast markings help the eye lock onto the plane faster when it gets small. Dark-on-light or light-on-dark patterns are usually easier to read than soft, blended artwork.
If you want a quick next step, compare the airplane's top, bottom, nose, and wingtip areas before your next flight. Those are the parts most likely to tell you what the plane is doing when it gets far enough away that details start fading.
A calmer airplane is easier to read because it gives you more time to confirm its attitude. Faster, twitchier behavior shortens the window between "I see it" and "I need to correct it."
That is why beginner-friendly models and spacing matter together. A plane that is easier to control is often easier to keep visible, especially when the field is small or the light is changing.
Fly Within a Range You Can Read Clearly
The safest habit is the simplest one: choose contrast that helps, fly a route you can predict, and stop before the airplane becomes hard to read. If the model starts blending into the sky, trees, glare, or haze, bring it closer. If you are guessing at orientation, slow down or land. That rule is better than chasing a number that does not fit every field or every pilot.
FAQs About RC Plane Visibility & Orientation
Q1: How Do I Know When My RC Airplane Is Too Far Away to Read Clearly?
If you can no longer confirm the nose, bank, and turn direction without strain, the airplane is too far for your current comfort level. The safer move is to bring it closer before you lose the visual reference completely. A good self-check is whether you are reading the aircraft or just watching a moving dot.
Q2: What Colors Make an RC Airplane Easier to See?
High-contrast top and bottom colors are usually easier to read than subtle schemes, and a distinct nose or wingtip marking can help significantly. The real test is the background you fly over most often. If the model blends into your sky or tree line, the color choice is not doing enough.
Q3: Can Lights Help With RC Airplane Visibility in Daytime?
Lights can add another cue, but they should not be treated as a daytime fix. In bright conditions, they are usually secondary to strong contrast, clear markings, and conservative distance. They help most when they support, rather than replace, plain visual readability.
Q4: Why Does My Plane Look Fine on the Ground but Disappear in the Air?
On the ground, you are close enough to see shape and detail. In the air, distance, angle, glare, haze, and background contrast change all at once. That is why a model can look obvious on the bench and still become hard to read the moment it turns away or crosses a bright sky.
Q5: What Should I Do First If I Lose Orientation While Flying?
Cut the panic inputs, try to level the wings, and move back toward a known visible path. If the plane still feels hard to read after that, land rather than forcing more distance or sharper corrections. The goal is to regain a clear picture, not to prove you can recover under pressure.
Q6: Do I Need Bigger Wings or Just Better Markings?
Better markings usually help first because they improve orientation without changing how the plane flies. Bigger wings can also make the model easier to spot, but they are not a substitute for contrast. If you already struggle to read the airplane at your current field, start with markings and then compare size if needed.